It’s really important to make sure your bike is safe and roadworthy, especially if it hasn't been used in a while.
Share
Here’s how to check your bike is safe to ride.
Your bike might have been sitting in the shed, or out in the rain. You might be borrowing a bike from a friend, or using a hire bike. Or you might just want to check if its showing any signs of wear and tear. Here’s how to
If in doubt with a hire bike, pick a different one or if it’s your own bike, take it to a bike shop to get it checked over.
Your bike should fit you and you should be able to put your feet on the ground and reach the brakes. Check the tyres are pumped up and the brakes work.
Whatever your situation, take a couple of minutes to do two checks – the ABC check and the ‘M’ check – so you can be confident your bike is safe to cycle away.
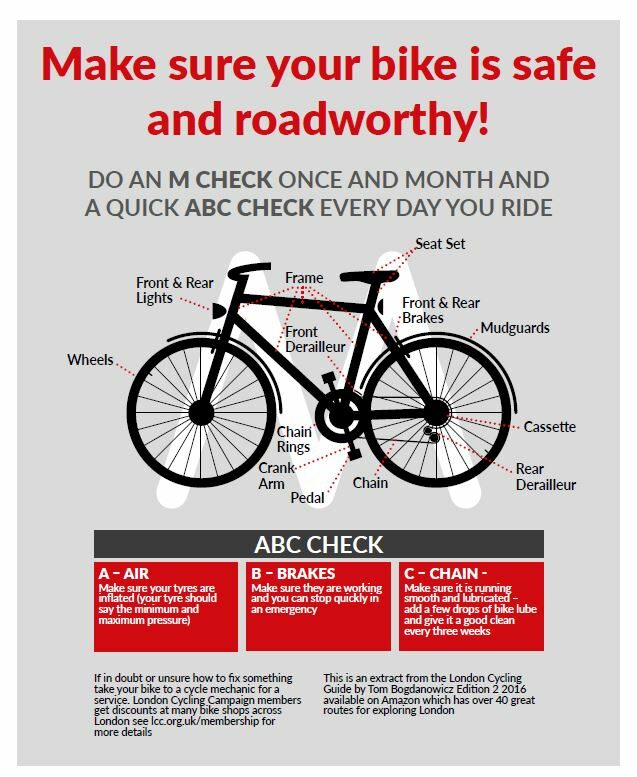
ABC check
This is a basic check you should do regularly and will only take a minute or so.
A – Air
Make sure your tyres are pumped up, if you can easily squeeze the tyre down then it probably needs inflating. You should inflate the tyres to the correct pressure, you’ll find this on marked on the side of your tyres. Many larger upright pumps have a display that tells you this – if your pump doesn’t have one you can always go to a bike shop and use theirs for free. If you only have a small hand pump then inflate the tyre as much you can.
B – Brakes
You have two brakes, front and back, and it’s important that both of these work. You need to make sure that when you have pull the brake that wheel does not move. If it does then the brakes may not be adjusted properly or you may need new brake pads.
C – Chain
Make sure your chain is well lubricated (oiled) and the chain runs freely if you move the pedals backward. Your chain, and the gears that it drives, wear out over time and may need to be replaced.
In addition…
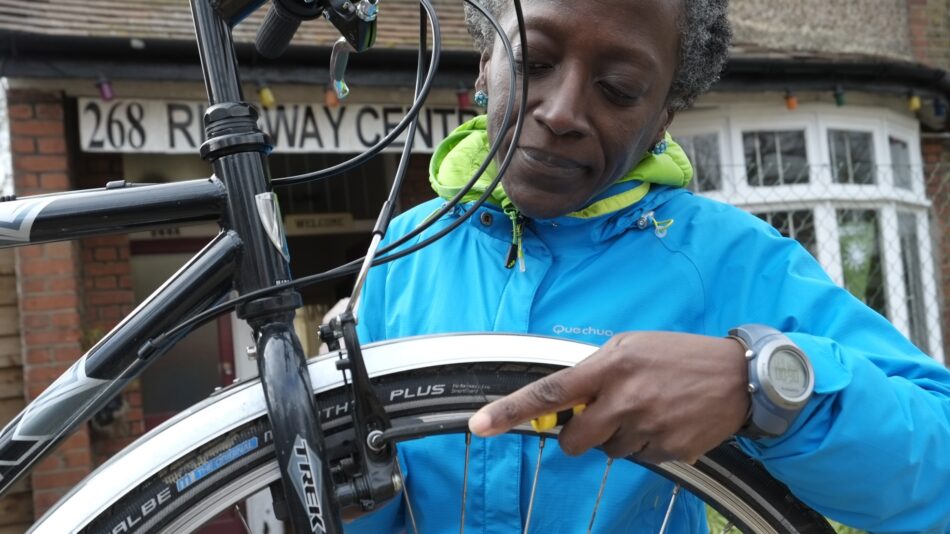
Part 1 of the video below runs through the ABC check – take a look. Carla also covers how to check your handlebars for good control.
And remember, if you are going to cycle at night make sure you have bike lights and reflectors on your bike. As well as making sure you can be seen for your own safety, it is a legal requirement.
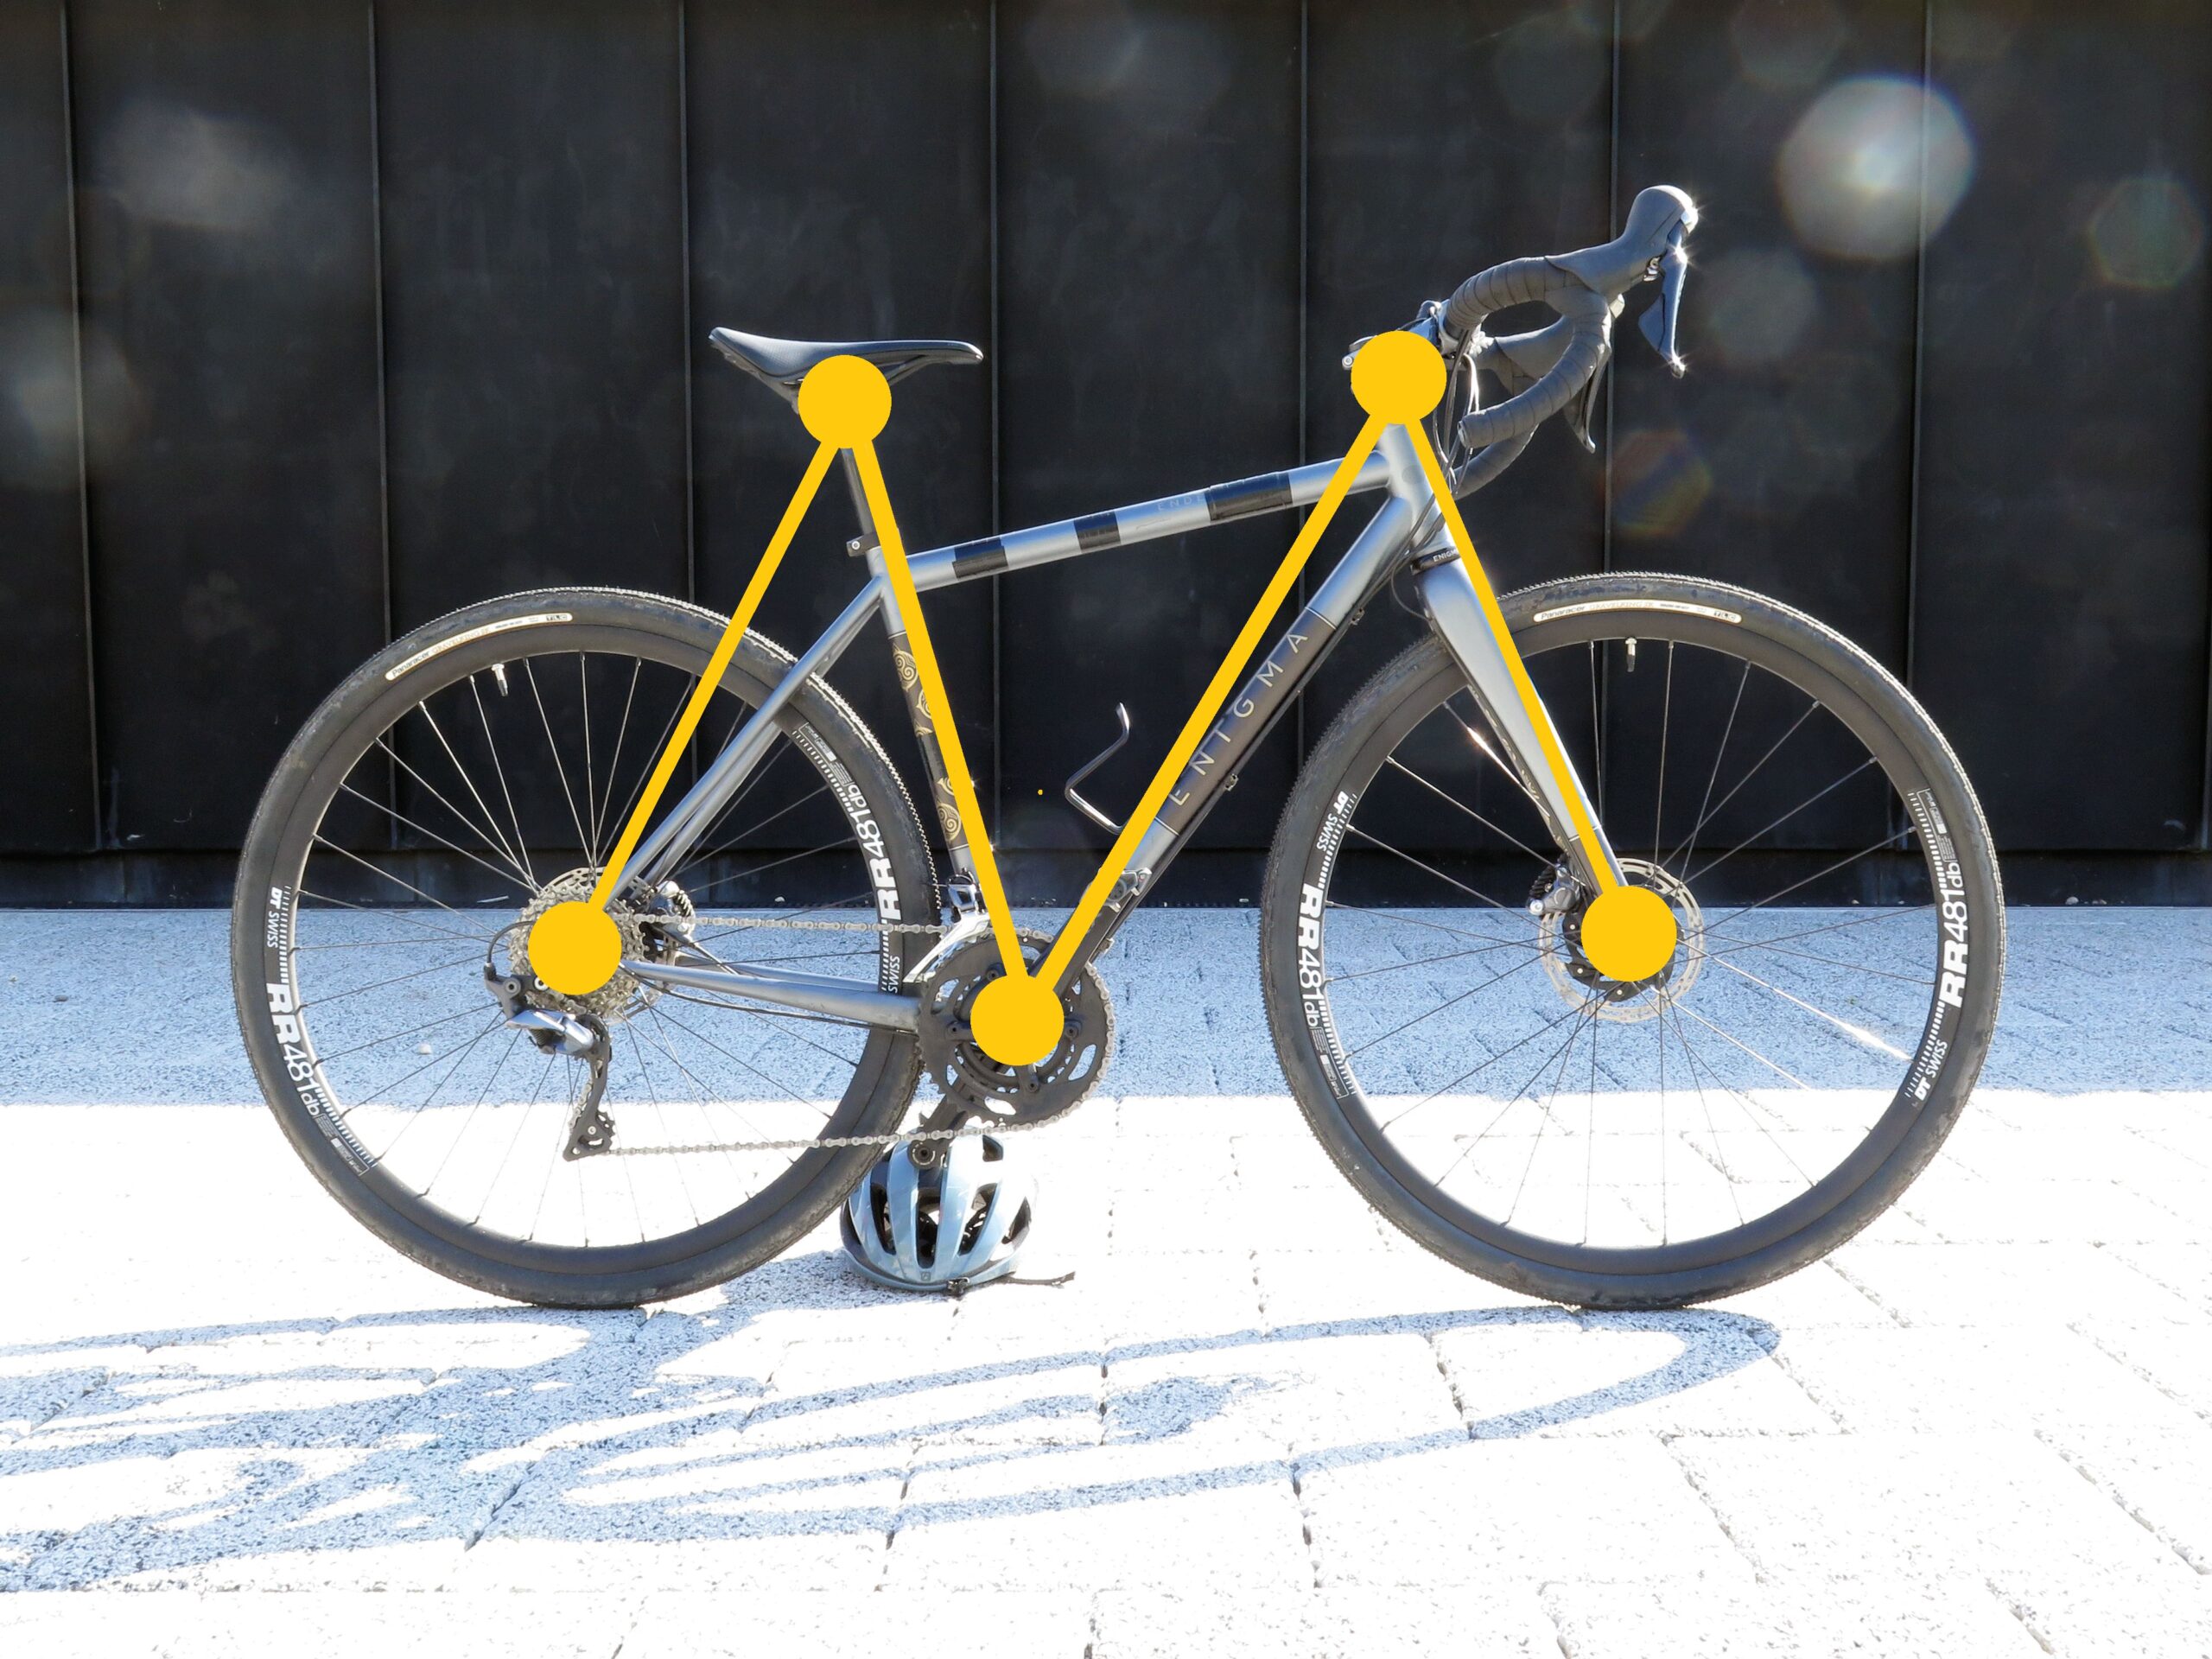
M check
An ‘M’ check is a simple way to check all the key parts of your bike are working as they should. It’s called this because it follows the shape of an M on your bike.
It doesn’t matter if you do the ‘M’ check front to back, or back to front, so long as you do the check regularly.
You don’t have to be a mechanic to identify if there is a problem: an Allen key set and bike pump are all the tools you need for the commonest ‘fixes’. Do this check at least once a month following the steps below:
M-CHECK: REAR WHEEL & REAR BRAKE
Quick-release skewer (or bolt-thru axle, or track nuts): check it’s tight and securely holding wheel in frame.
Tyre pressure: hard for road riding, a little softer for off-road and wet conditions.
Brakes: check the wheel is spinning freely in the brake caliper and not catching.
Gears: if your gears are clicking/slipping, try adjusting the derailleur barrel adjuster by one quarter turn at a time. Clockwise to loosen the cable, anti-clockwise to tighten. A tighter cable will move the derailleur up the cassette.
M-CHECK: SADDLE & SEAT-POST
Saddle: grip the saddle at the front and back and rock it to see if it moves up and down, or side to side. If it does then you can tighten the bolt(s) on the clamp underneath the saddle (the part that holds the ‘rails’).
Seat-post: check there’s no movement in the seat-clamp (the collar holding the seat-post in the frame). An Allen key tighten should resolve any issue.
M-CHECK: PEDALS, CRANKS & CHAIN
Pedals: hold the crank arm with one hand and wiggle the pedal with the other. If it’s loose, tighten with a pedal spanner or Allen key.
Cranks: if there’s any play when tugging the crank arms, the crank bolts might need a tighten. Don’t overdo it, the cranks must spin freely.
Chain: spin the pedals backwards to check the chain moves freely and there’s no seized links. Lubricate if needed.
M-CHECK: STEERING & CONTROLS
Brake/gear levers: check the shifters move freely. Brake levers should not be too firm or pull to the bar.
Bars/stem: grip the bar in all the usual positions and pull up and down. If it moves, the stem clamp bolts might need a little tighten.
Headset: check there’s no rocking by pulling the front brake lever with one hand, while the other holds the upper headset/headtube.
M-CHECK: FRONT WHEEL & FRONT BRAKE
Quick-release skewer (or bolt-thru axle, or track nuts): check it’s tight and securely holding wheel in frame and not rocking.
Tyre pressure: same as the rear tyre. Squeeze the side of the tyre (not push the top) to see if it needs more/less air. All tyres have a suggested pressure range on the side.
Brakes: same as rear brake. Also check both sets of pads aren’t worn.
Need a mechanic?
If you do find anything isn’t right then take it to your local bike shop for repairs – you can pay for a service or for a specific problem to be fixed. Or see if there are any community bike check events near you - often there will be a 'Dr Bike' or even a workshop that will teach you how to fix your own bike. Our searchable map shows bike shops offering LCC members a discount.
All the latest cycling news, campaigns and information straight to your inbox.
We use cookies on our website to give you the most relevant experience by remembering your preferences and repeat visits. By clicking “Accept All”, you consent to the use of ALL the cookies. However, you may visit "Cookie Settings" to provide a controlled consent.
This website uses cookies to improve your experience while you navigate through the website. Out of these, the cookies that are categorized as necessary are stored on your browser as they are essential for the working of basic functionalities of the website. We also use third-party cookies that help us analyze and understand how you use this website. These cookies will be stored in your browser only with your consent. You also have the option to opt-out of these cookies. But opting out of some of these cookies may affect your browsing experience.
Necessary cookies are absolutely essential for the website to function properly. These cookies ensure basic functionalities and security features of the website, anonymously.
Cookie
Duration
Description
cookielawinfo-checkbox-analytics
11 months
This cookie is set by GDPR Cookie Consent plugin. The cookie is used to store the user consent for the cookies in the category "Analytics".
cookielawinfo-checkbox-functional
11 months
The cookie is set by GDPR cookie consent to record the user consent for the cookies in the category "Functional".
cookielawinfo-checkbox-necessary
11 months
This cookie is set by GDPR Cookie Consent plugin. The cookies is used to store the user consent for the cookies in the category "Necessary".
cookielawinfo-checkbox-others
11 months
This cookie is set by GDPR Cookie Consent plugin. The cookie is used to store the user consent for the cookies in the category "Other.
cookielawinfo-checkbox-performance
11 months
This cookie is set by GDPR Cookie Consent plugin. The cookie is used to store the user consent for the cookies in the category "Performance".
viewed_cookie_policy
11 months
The cookie is set by the GDPR Cookie Consent plugin and is used to store whether or not user has consented to the use of cookies. It does not store any personal data.
Functional cookies help to perform certain functionalities like sharing the content of the website on social media platforms, collect feedbacks, and other third-party features.
Performance cookies are used to understand and analyze the key performance indexes of the website which helps in delivering a better user experience for the visitors.
Analytical cookies are used to understand how visitors interact with the website. These cookies help provide information on metrics the number of visitors, bounce rate, traffic source, etc.
Advertisement cookies are used to provide visitors with relevant ads and marketing campaigns. These cookies track visitors across websites and collect information to provide customized ads.